



How to Install a Whole-Home Structured Water Unit: Complete DIY Installation Guide
Installing a whole-home structured water unit transforms every water source in your home—showers, sinks, appliances, and outdoor faucets. The installation process takes most plumbers 1-2 hours and requires plumbing knowledge and standard tools.
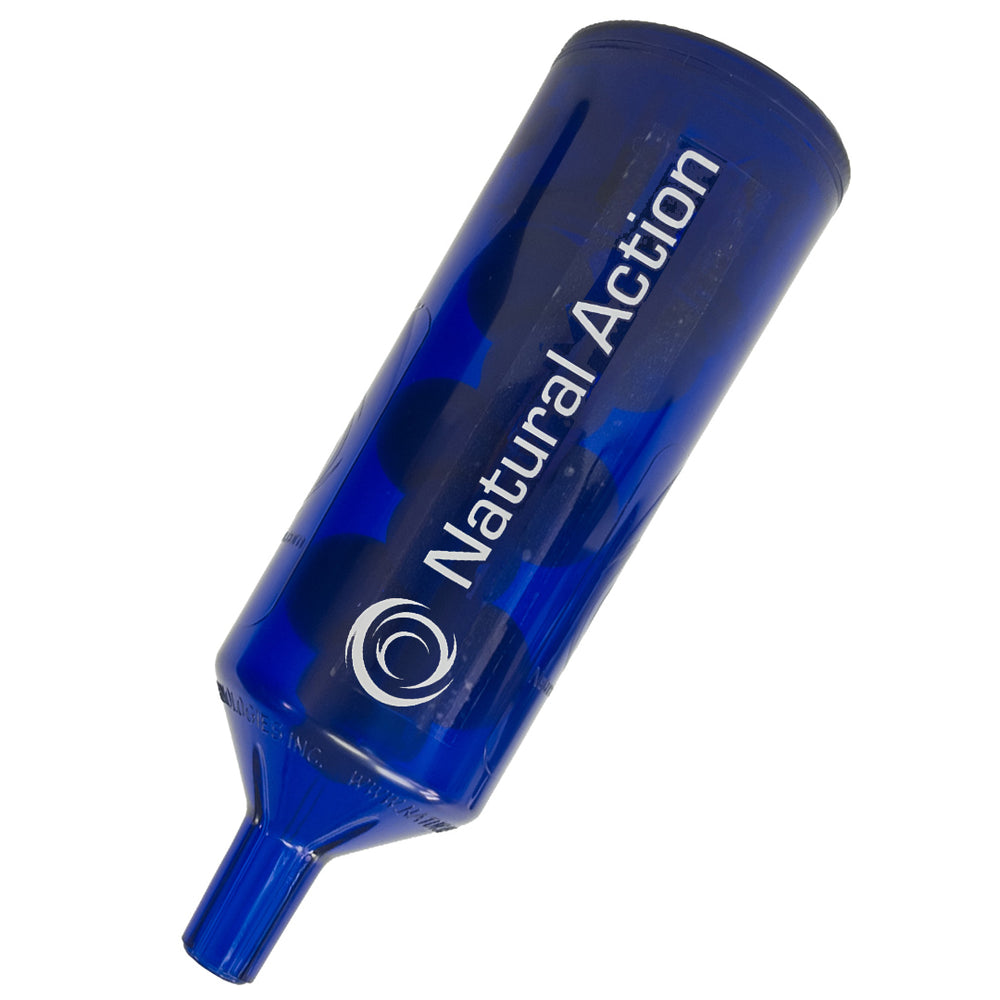
This guide walks through the complete installation process for a Natural Action Whole Home Revitalizer, from preparation through testing. While these instructions apply specifically to Natural Action units, the general approach works for most inline water structuring devices.
What You'll Need
Tools:
- Pipe cutter or hacksaw
- Adjustable wrench or pipe wrench
- Tape measure
- Marker or pencil
- Bucket or towels (for residual water)
- Teflon tape (if using threaded connections)
Materials (included with most units):
- Whole Home Revitalizer unit
- Threaded NPT adapters on each end
Optional:
- Pipe hangers or support straps
- Ball valves for isolation (makes future maintenance easier)
Before You Start: Critical Preparation Steps
1. Verify Your Pipe Size
Natural Action Whole Home units come in 3/4-inch or 1-inch configurations. Measure your main water line before ordering. Most homes use 3/4-inch or 1-inch copper, PEX, or CPVC pipe where water enters the building.
2. Choose the Installation Location
Install the unit on the cold water main line after the water meter and before the water heater. This ensures all water entering your home—hot and cold—flows through the structuring unit.
Ideal installation points:
- Immediately after the water meter (inside your home)
- Before your water heater and any branch lines split off to bathrooms, kitchen, or outdoor faucets
- In a basement, utility room, or crawl space with easy access
Avoid installing:
- Outdoors in freezing climates (units can crack if water freezes inside)
- After the water heater on the hot line only
- In locations with no access for future inspection
3. Know Your Shut-Off Valve Location
Locate your main water shut-off valve before starting work. This is typically near where the water line enters your home, close to the water meter. You'll need to turn off all water to your home during installation.
4. Check Local Codes
Some municipalities require licensed plumbers for any main line work. Check local plumbing codes before starting. If professional installation is required, use this guide to communicate your needs clearly to your plumber.
Step 1: Shut Off Water and Drain the Line
Turn off the main water supply at the shut-off valve. Turn the valve clockwise until it stops.
Open a cold water faucet at the lowest point in your home (basement sink or outdoor hose bib). Leave it open until water stops flowing. This relieves pressure in the system and drains residual water from the pipes.
Keep the faucet open during installation to prevent air locks.
Step 2: Measure and Mark the Cut Location
Measure the full length of your assembled Whole Home unit with connectors attached. Most Natural Action HD-24 units measure approximately 10-12 inches fully assembled with fittings.
Subtract 2 inches from this measurement. This accounts for the insertion depth of the push-fit connectors into the existing pipe.
Mark this measurement on your main water line where you want to install the unit. Use a marker to draw two clear cut lines on the pipe.
Example: If your unit with connectors measures 11 inches, mark cut lines 9 inches apart on your existing pipe.
Step 3: Cut the Pipe
Use a pipe cutter or hacksaw to cut the pipe at both marked locations. Make straight, clean cuts perpendicular to the pipe.
For copper pipe: Use a tubing cutter for the cleanest cut. Rotate the cutter around the pipe, tightening gradually with each rotation.
For PEX or CPVC: A PEX cutter or hacksaw works well. Ensure cuts are square, not angled.
After cutting, remove any burrs from the inside and outside edges of the pipe using a deburring tool or sandpaper. Burrs prevent proper sealing with push-fit connectors.
Have a bucket ready to catch any remaining water in the pipes.
Step 4: Prepare the Pipe Ends
Wipe the cut pipe ends clean and dry. Push-fit connectors require clean, dry pipe for a proper seal.
If using copper pipe, check that the pipe is perfectly round. Dented or oval pipes won't seal properly with SharkBite fittings. Use a pipe-rounding tool if needed.
Mark the insertion depth on each pipe end—typically 1 inch for 3/4-inch pipe and 1-1/8 inches for 1-inch pipe. This ensures you push the connector fully onto the pipe.
Step 5: Attach Connectors to the Unit
Most Natural Action units ship with the connectors separate. Attach the SharkBite push-fit connectors (or threaded adapters) to both ends of the Whole Home unit.
Critical: Check flow direction. The unit has a flow direction arrow stamped or labeled on the housing. Water must flow in the direction of this arrow for proper vortex action. Install the unit so the arrow points in the direction water flows from your meter toward your home.
If using threaded connections, wrap the threads with 3-4 layers of Teflon tape in a clockwise direction. Hand-tighten, then use a wrench to turn an additional 1-2 turns. Do not overtighten—this can crack the housing.
Step 6: Install the Unit
Push one connector onto one of the cut pipe ends. Push firmly until the pipe reaches the insertion depth mark. You should feel resistance, then a click or solid stop when fully seated.
With one end connected, align the other connector with the opposite cut pipe end. Push the unit toward that pipe while guiding the connector onto the pipe. This may require slight flexing of the pipes.
Push the second connector fully onto the pipe until it reaches the insertion depth mark.
Orientation: The unit can be installed horizontally or vertically. Flow direction matters, but orientation does not affect performance.
Step 7: Support the Unit (Recommended)
Structured water units are heavy—especially when filled with water. Do not let the unit hang unsupported from the pipe connections.
Install pipe hangers, straps, or a shelf to support the weight of the unit. This prevents stress on the connections and reduces the risk of leaks over time.
Position supports so they hold the unit without blocking access to the connectors.
Step 8: Turn On Water and Check for Leaks
Close the cold water faucet you opened in Step 1.
Slowly turn on the main water supply. Open the valve gradually—a quarter turn at a time—to allow water to fill the system without causing a pressure surge.
As water fills the pipes, check all connections carefully for leaks. Look for drips, moisture, or water seeping from the connectors.
If you see a leak:
- Turn off the water immediately
- Check that pipes are fully inserted to the depth marks
- Verify pipes are clean, dry, and free of burrs
- Remove and reseat the connector, ensuring a straight insertion
Once you confirm no leaks, open the valve fully.
Step 9: Purge Air from the System
Open all faucets in your home—hot and cold—starting with the lowest level and working up. Let water run until it flows smoothly without sputtering or air bursts.
This purges air that entered the system during installation. It typically takes 2-5 minutes per faucet.
Step 10: Test Water Quality
Run water from a cold tap for 30 seconds. Many users report that structured water feels smoother and tastes cleaner immediately.
Check for:
- Smooth water flow at all faucets
- No unusual noises in pipes
- Consistent water pressure (should match pre-installation levels)
Your structured water system is now operational. Water flowing through the unit undergoes vortex motion that restructures its molecular arrangement.
Installation with Existing Filtration Systems
If you have a whole-home water filter, water softener, or other treatment system, install the Whole Home Revitalizer after the filtration system. This ensures water is filtered first, then structured.
Recommended sequence:
- Water meter
- Whole-home filter or softener
- Whole Home Revitalizer
- Branch lines to home
This positioning allows the structuring unit to work with clean, filtered water while ensuring all water in your home—including hot water—is structured.
Common Installation Mistakes to Avoid
Installing the unit backward: The flow direction arrow must point toward your home, away from the meter. Reversed flow prevents proper vortex action.
Overtightening threaded connections: The unit housing can crack under excessive torque. Hand-tight plus 1-2 turns with a wrench is sufficient.
Skipping pipe preparation: Burrs, dirt, or moisture on pipe ends cause leaks with push-fit connectors. Always clean and dry pipes before connecting.
No pipe support: Letting the unit hang from connections stresses the fittings and increases leak risk over time.
Outdoor installation in freezing climates: Water trapped in the unit can freeze and crack the housing. Install indoors or drain the unit before freezing temperatures.
Cutting the pipe too short: If you remove too much pipe, the unit won't fit. Measure twice, cut once. It's better to remove slightly less—you can always trim more if needed.
Troubleshooting Common Problems
Problem: Water pressure is lower after installation
Cause: Air trapped in the system, or a partially closed valve.
Solution: Purge all faucets again to remove air. Check that the main shut-off valve is fully open. Verify no debris is blocking the unit inlet (rare, but possible if pipes were dirty during installation).
Problem: Leak at push-fit connector
Cause: Pipe not fully inserted, burrs on pipe end, or damaged O-ring in connector.
Solution: Turn off water. Remove the connector using a SharkBite disconnect tool. Inspect the pipe—ensure it's clean, round, and burr-free. Check the O-ring inside the connector for damage. Reseat the connector, pushing firmly until you feel it click into place.
Problem: Unit rattles or makes noise
Cause: This is normal. The unit contains geometric chambers and forms that align water flow. Some rattling is expected and does not indicate a problem.
Solution: If the noise is excessive, check that the unit is properly supported and not vibrating against nearby pipes or walls.
Problem: No noticeable difference in water
Cause: Expectations vary. Structured water changes are often subtle—smoother feel, slightly better taste. Some people notice differences immediately; others take weeks to perceive changes.
Solution: Give it time. Many users report noticing differences in skin feel after showers, reduced scale buildup over weeks, and improved plant health in gardens. The molecular changes occur immediately, but subjective perception varies.
Problem: Water heater makes noise after installation
Cause: Structured water can loosen existing mineral deposits (aragonite) in your water heater tank. These deposits may shift and settle, causing temporary noise.
Solution: Drain your water heater to flush out loosened sediment. This may need to be done weekly for the first month after installation, then periodically as needed. Consult a plumber if you're unfamiliar with water heater maintenance.
Maintenance and Long-Term Care
Natural Action Whole Home units require no filters, no electricity, and no routine maintenance. The unit is passive—it structures water through geometry and flow dynamics alone.
Annual inspection: Once per year, visually inspect connections for any signs of moisture or corrosion. Tighten connections if needed.
No filter changes: Unlike filtration systems, structured water units have no consumables to replace.
Lifespan: Natural Action units come with a lifetime warranty and are built to last decades with proper installation.
When to Call a Professional
Consider hiring a licensed plumber if:
- Local codes require professional installation
- You're uncomfortable working with your main water line
- Your plumbing uses galvanized steel pipe (requires threading tools)
- You need to install shut-off valves or modify existing plumbing
Provide your plumber with this guide and the unit specifications to ensure proper installation.
What to Expect After Installation
Immediate effects:
- Water may taste cleaner and feel smoother
- Showers may feel softer on skin and hair
Within weeks:
- Reduced water spotting on dishes and fixtures
- Less soap scum buildup in showers
- Improved plant health if using structured water in gardens
Within months:
- Reduced scale buildup in pipes and appliances
- Potential decrease in detergent and soap usage
- Longer appliance lifespan due to reduced mineral deposits
Results vary based on your source water quality and household usage patterns.